

Travel vlogs are one of the most fun and inspiring ways to share your adventures with friends, family, and the online world. Whether you’re hiking through mountains, exploring city streets, or soaking up beach sunsets, the way you edit your footage makes all the difference. Editing gives your vlog its personality—it turns raw clips into a smooth, engaging story. CapCut Desktop Video Editing Software has quickly become a favorite for many vloggers because it’s powerful, easy to use, and packed with features designed for both beginners and advanced creators. If you want to transform your travel footage into something worth watching, CapCut is the perfect place to start.
Why Choose CapCut Desktop for Travel Vlogs?
Before diving into the editing steps, let’s look at why CapCut stands out for travel vloggers:- User-Friendly Interface: The layout is intuitive, which means you don’t need to be a professional editor to start creating.
- Free and Accessible: CapCut Desktop is free to download, allowing you to edit without incurring expenses on expensive software.
- Creative Tools: This includes text, filters, transitions, overlays, and special effects that add a cinematic touch to your travel vlog.
- AI Features: Tools such as auto-subtitles, background music suggestions, and Voice Changer make the process faster.
- Multi-Format Export: Whether you want to share your vlog on YouTube, Instagram, or TikTok, CapCut gives you the right export settings.
How to Edit Travel Vlogs in CapCut Desktop
Here’s a simple, beginner-friendly workflow to get your travel vlog ready for the world:Step 1: Import and Organize Your Footage
The first step is to get all your raw clips, photos, and audio files into CapCut. Open CapCut Desktop and create a new project. Import your travel clips by dragging them into the media library. You can also bring in background music, voiceovers, or sound effects at this stage. Organize your footage on the timeline. Start by placing the clips in chronological order to create a natural storytelling flow. For example, if you filmed your journey from the airport to your destination, arrange the clips so viewers can experience it step by step. Trim away unnecessary footage early on. If you filmed 10 minutes of walking through a market, keep only the most colorful and engaging parts. Viewers love highlights, not long, repetitive shots.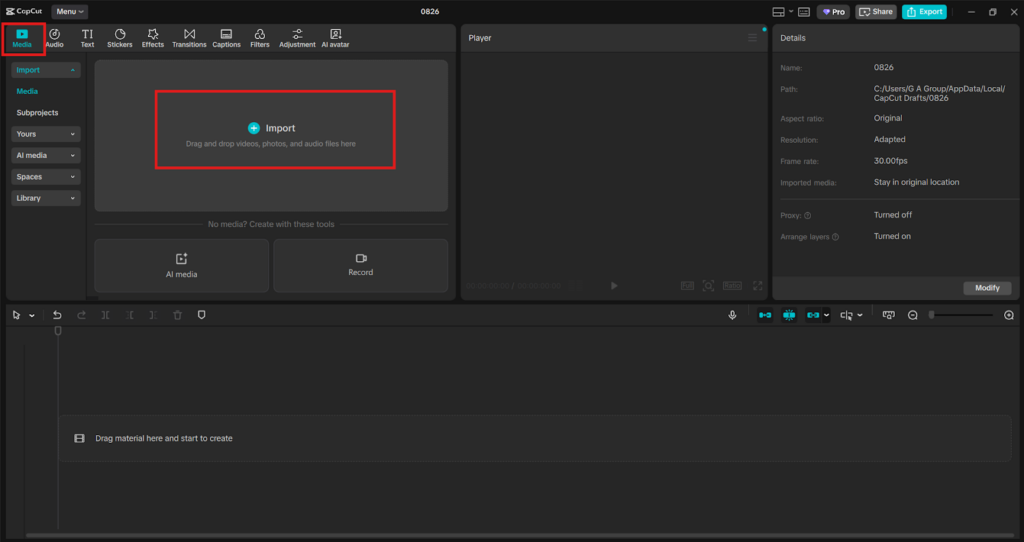
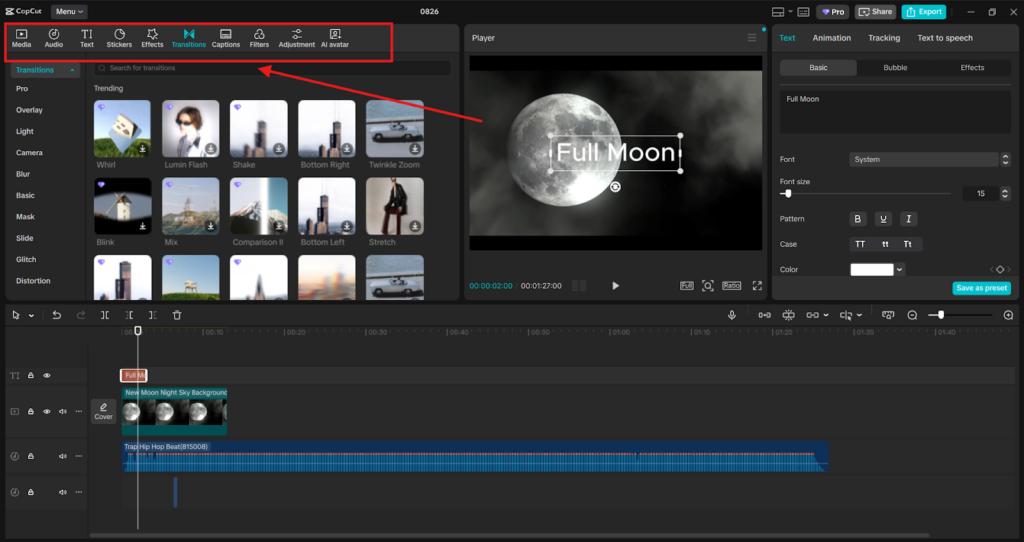
Step 2: Enhance with Transitions, Effects, and Music
Once your clips are in order, it’s time to bring your travel vlog to life.- Add Transitions: Between clips, use smooth transitions like “cross dissolve” or “slide” to make your vlog feel seamless. Avoid using too many flashy transitions—it’s best to keep it natural. Use CapCut’s Online Photo Editor tool to edit your photo content.
- Apply Filters and Color Correction: CapCut allows you to adjust brightness, contrast, and saturation. Travel vlogs often benefit from brighter, more vibrant colors to make landscapes and cityscapes pop.
- Overlay Text and Titles: Add location names or fun text overlays to enhance your content. For example, if you’re in Rome, place a stylish text animation that says “Exploring the Streets of Rome.”
- Add Music and Sound Effects: Background music sets the tone of your vlog. CapCut has a built-in music library, but you can also upload your own royalty-free tracks. Match the vibe—upbeat music for city explorations, calm acoustic tracks for nature views. Don’t forget to adjust audio levels. Lower the background music when you’re speaking, so your voice is clear.
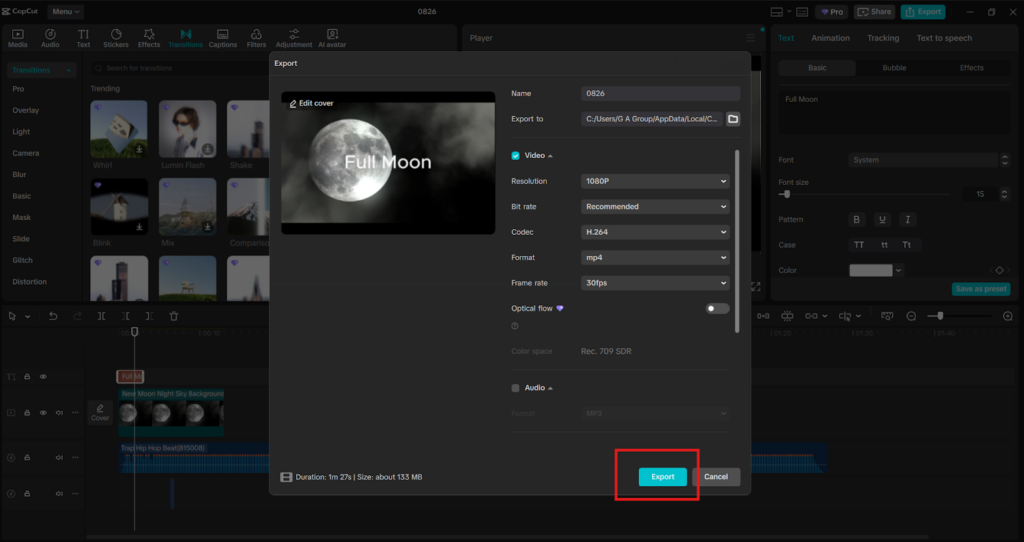
Step 3: Fine-Tune and Export
This is where your vlog takes a leap from good to great.- Refine Your Cuts: Review the video again and trim any awkward pauses or shaky footage to enhance the overall quality.
- Use Keyframes for Movement: CapCut enables you to zoom in or pan across still shots using keyframes, adding a dynamic effect to static clips.
- Add Subtitles or Captions: If you’re sharing your vlog with an international audience, auto-subtitles are a helpful feature. They also improve accessibility.
- Preview Your Vlog: Watch the whole video before exporting. Pay attention to pacing—does it flow smoothly, or does it drag in some areas?
- Export in High Quality: For YouTube or big screens, export in 1080p or 4K. For social media, CapCut offers export settings tailored to each platform. Always keep a copy of your project file. That way, you can easily re-edit or update your vlog later.
Extra Tips to Make Your Travel Vlogs Shine
- Tell a Story: Instead of random clips, structure your vlog like a journey. Begin with your arrival, highlight key experiences, and conclude with reflections or farewells.
- Keep It Short and Engaging: Aim for 5–10 minutes for YouTube or under 2 minutes for Instagram/TikTok. Attention spans online are short.
- Mix Perspectives: Use wide shots for landscapes, close-ups for food or details, and selfie-style shots to connect with viewers on a personal level.
- Add Humor and Personality: Don’t be afraid to include funny moments, bloopers, or personal commentary. This makes your vlog feel authentic.
- Leverage CapCut’s AI Tools: Try the auto-cutout feature to remove backgrounds, or experiment with AI-generated captions to save editing time.


